A few years back I decided to make my firstborn a workbench, so he could work on his projects while I worked on mine. I looked at a few pictures online for inspiration, decided on what I liked, and came up with this.
I’ve decided to outline the process in case anyone else wants to make one for their kid or something similar. I didn’t have any detailed plans when I made mine (just a quick sketch and some measurements), but it’s always nice to have some more detailed instructions when working from someone else’s design (or referencing it).
It’s hard to know when writing something like this how tedious you need to be with the steps. I tried to make things fairly clear and simple, but there are a few spots where I assume you can figure out the redundant steps or calculate a dimension based on the other ones provided. However if something is unclear, or if I left out an important detail please let me know and I will update it as needed.
This is a fairly straight forward woodworking project, but it is assumed that you have some idea of what your doing, have access to tools, etc, and know how to be safe. I won’t be covering any of that as this is more about the design and assembly. There are plenty of other resources out there that can help with the other stuff if you need it.
Parts List
| Part(s) | Qty. | Description | Est. Price |
|---|---|---|---|
| 3in Construction Screws | 1 box (50ct) | #9 3in star head construction screws (50 ct or more) | $6 |
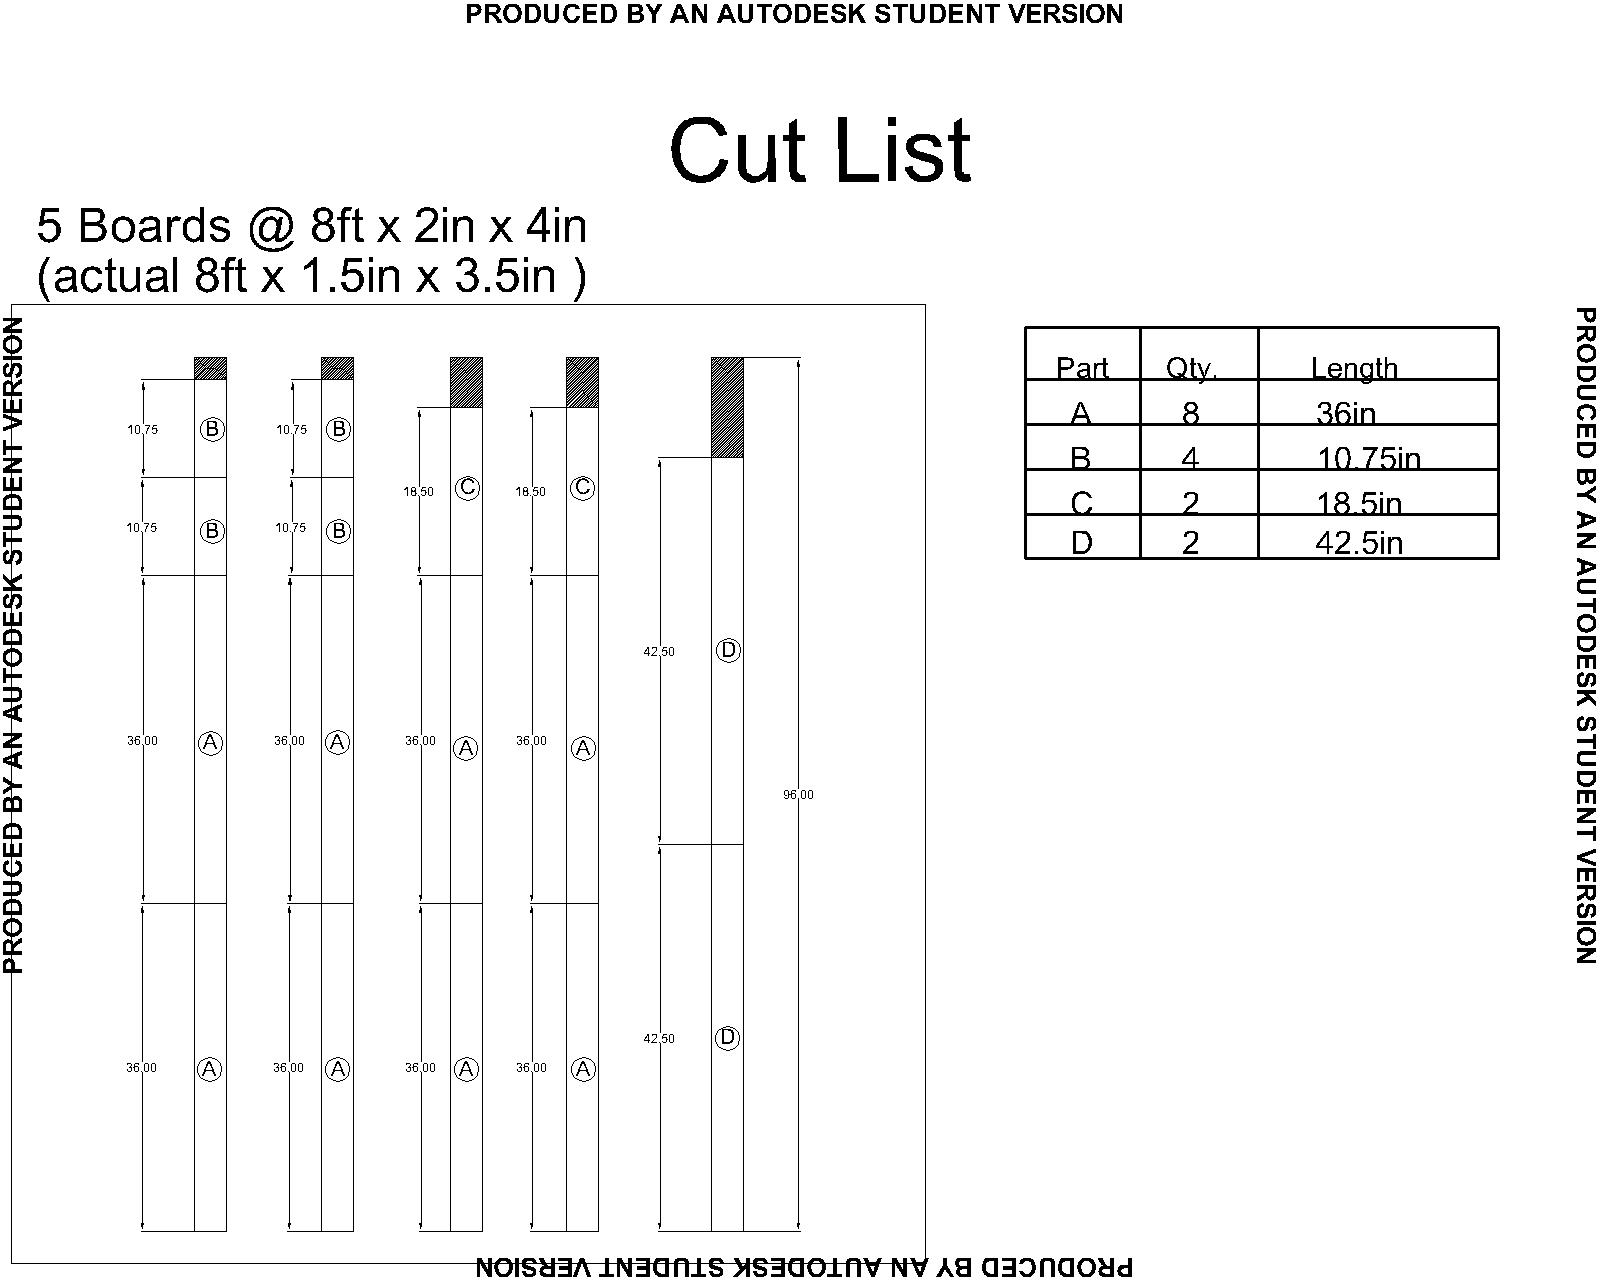
| 2 x 4's | 5 | Any typical 2 x 4, try to avoid knots, holes or warping | $20 (5 @ $4 ea.) |
| Pan Head Screws or sharp point Lath Screws (optional) | 2 | These are for securing the top of the pegboard | $1 |
| Pegboard | 1 | if you can find 2ft x 3ft, or get 2ft x 4ft and cut it | $10 |
| Yardstick | 1 | get a cheap one from lowes or home depot | $1 |
| Wood glue/ 3/4" brad nails (optional) | this if for securing the yardstick to the front of the workbench | ||
| Spray Paint | 1 | get whatever color you want the pegboard to be | $4 |
Note: Pocket holes and screws or other fasteners of your choice could be used. I went with construction screws in this tutorial for simplicity, but feel free to change things based on what you like or have available. The brad nails and wood glue are optional because you are likely to have enough on hand or you can use screws if you don’t want to have to buy these for how little is used (screws just affect how clean it looks).
Let’s round-up for our budget and say you should be able to do this project for $50 (or less if you already have some materials).
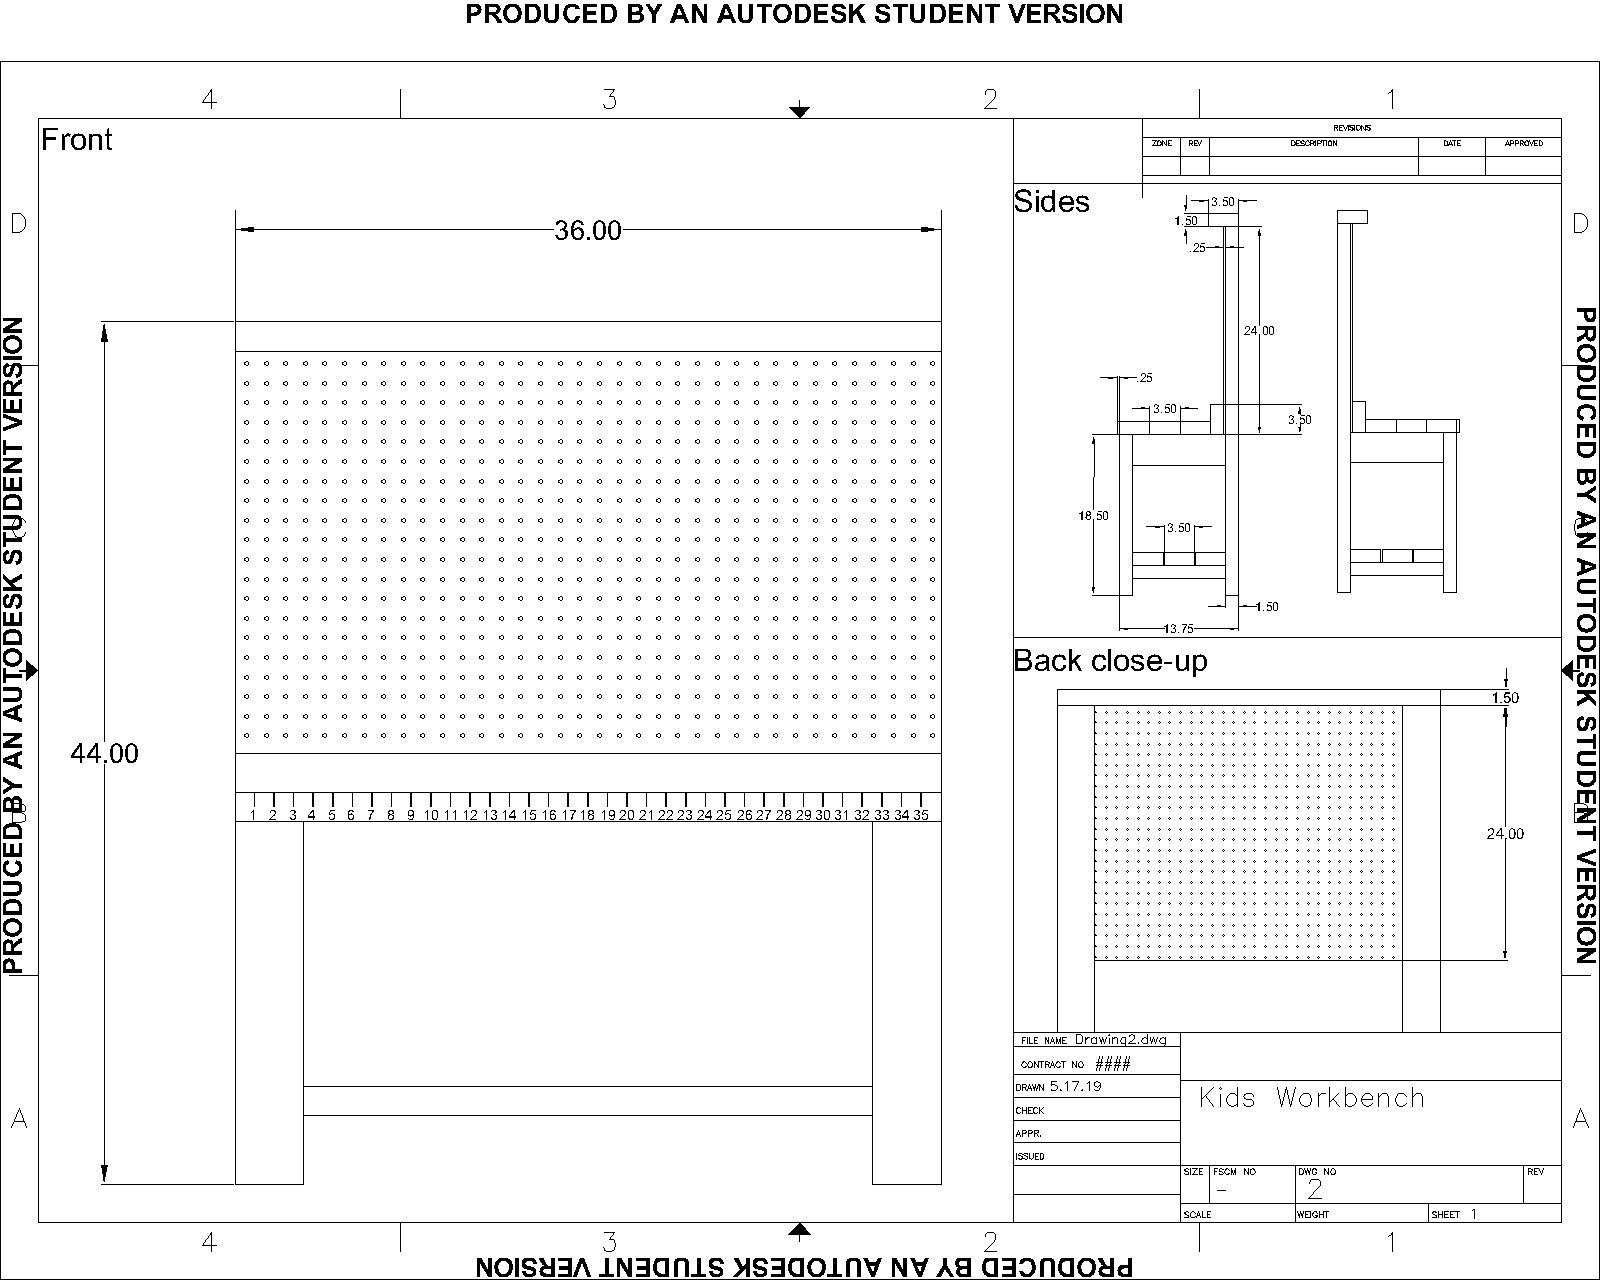
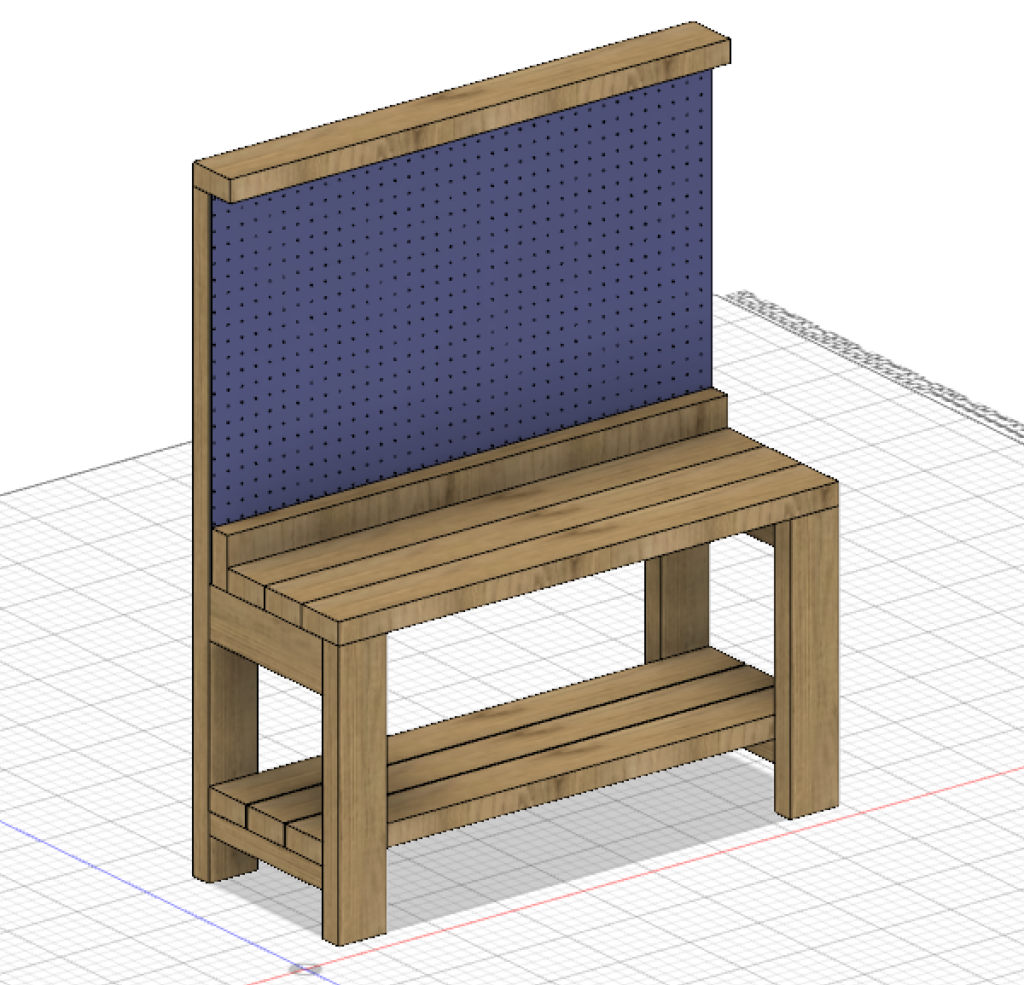
Once you’ve gotten your materials ready, you’ll probably want to print out at least the cut list and the 3d diagram with the parts labeled (shown below).
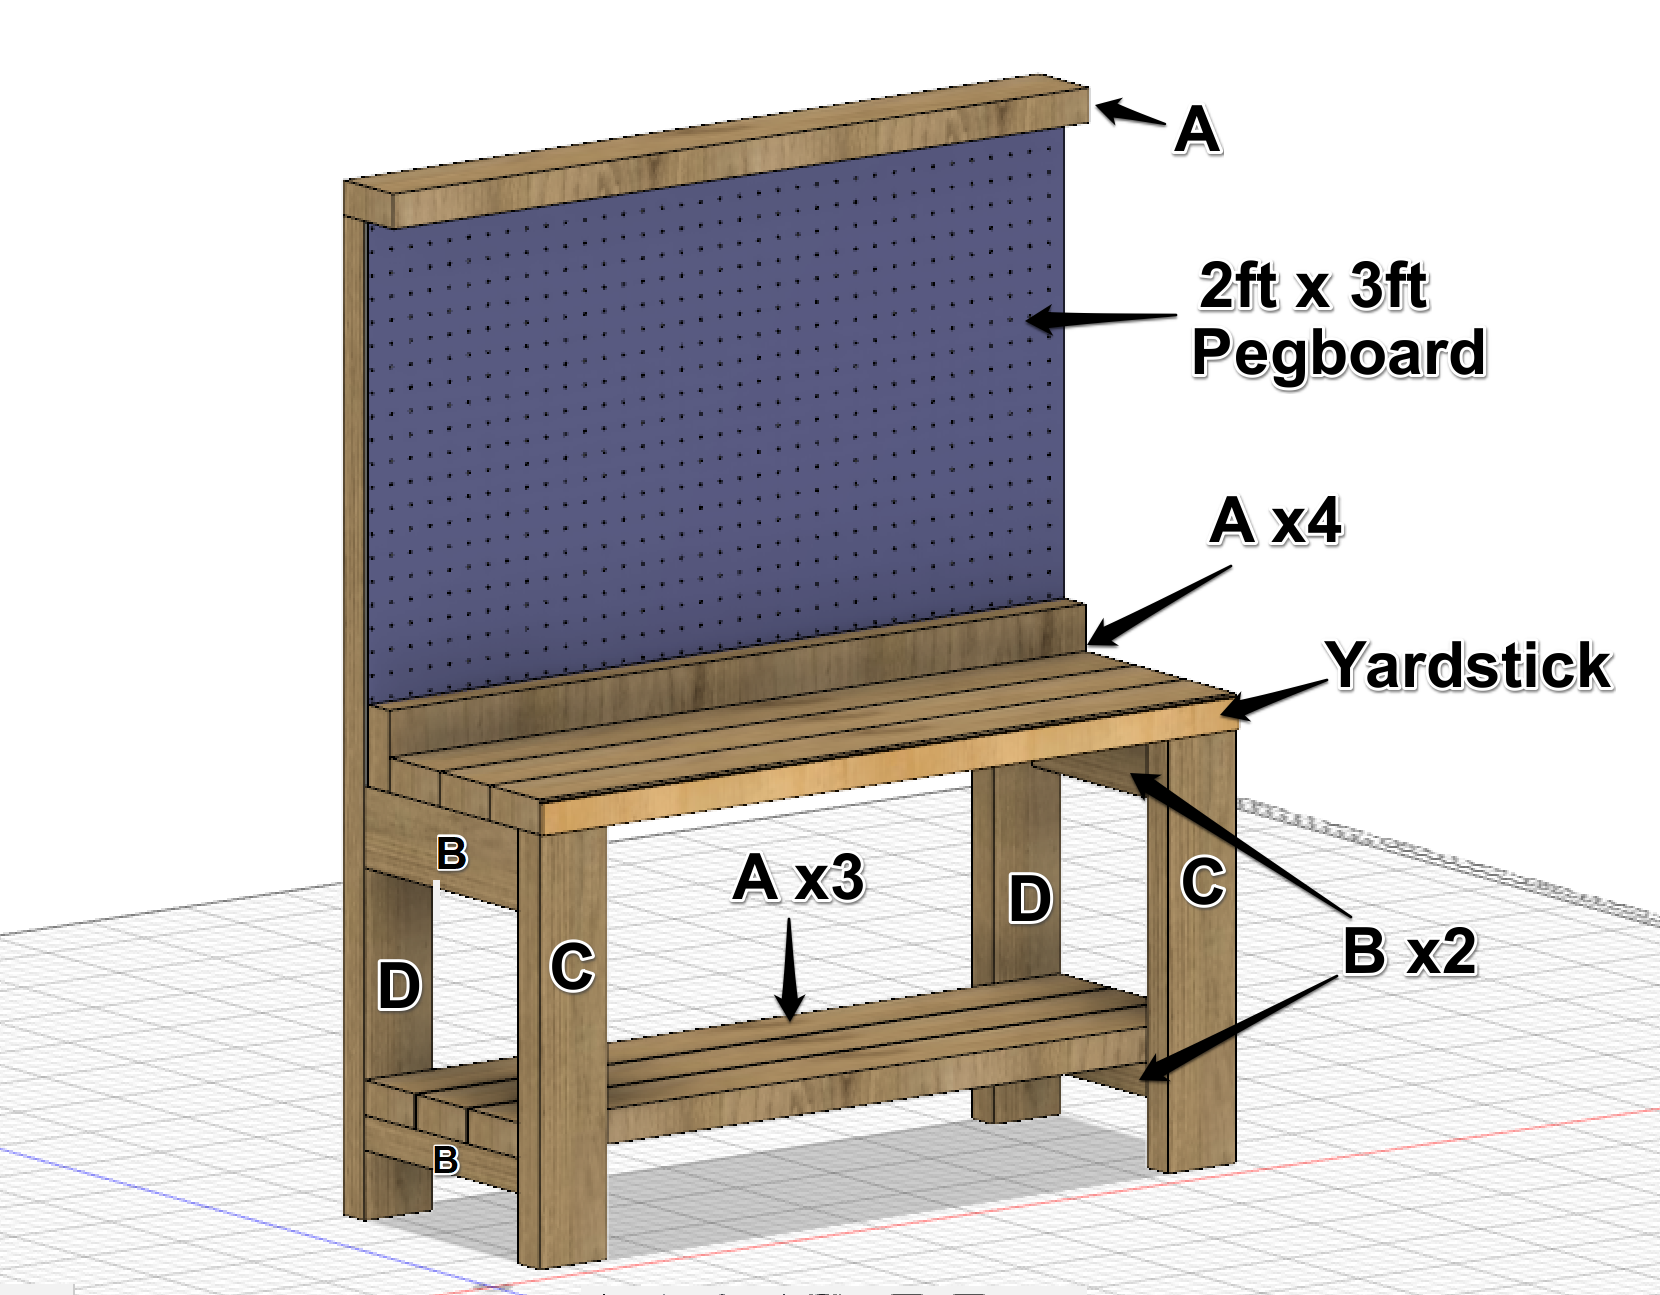

Align piece B with the top and outside edge of C.
Option 1: The top B piece could be horizontal instead of vertical, which would also allow you to make two identical legs instead of a left and right. It’s really about what aesthetic you’re going after.
Connect D to your assembly.

Connect your second B piece to your assembly.
The placement is based on how much room you want for your shelf.
Mine was placed 3in off the ground.
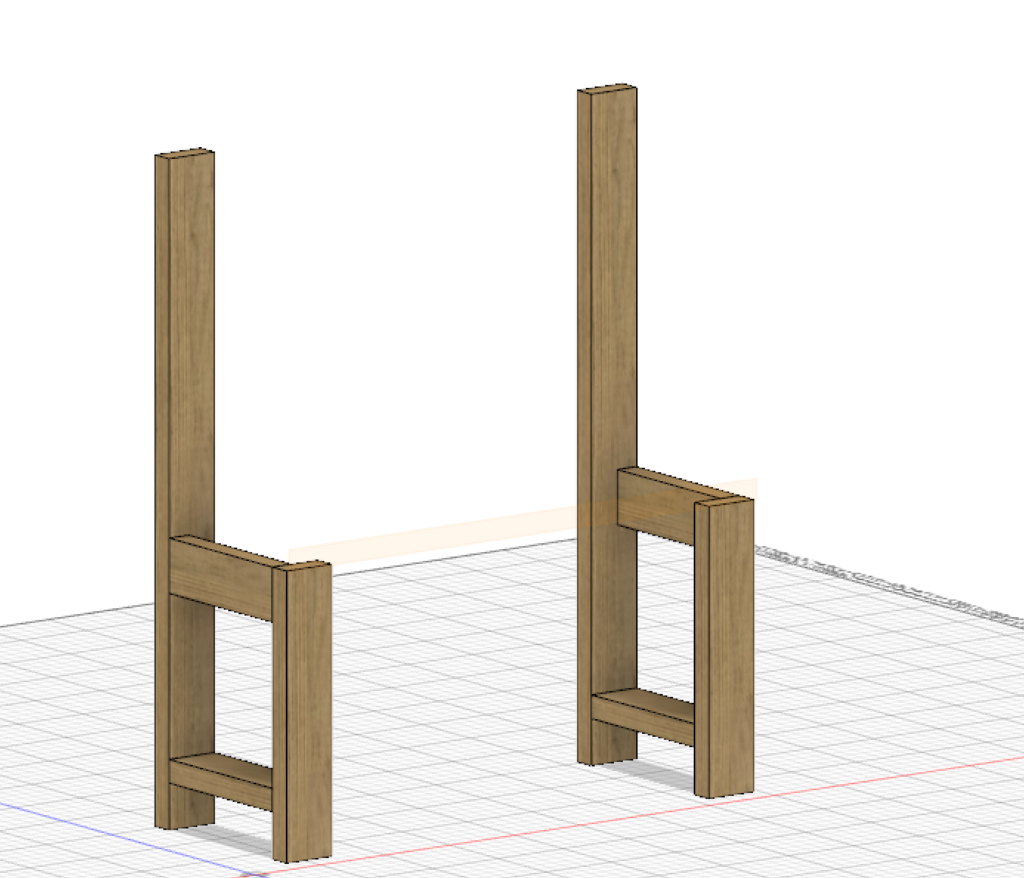
Repeat steps 1-3 (adjusting step 1 for the opposite side).
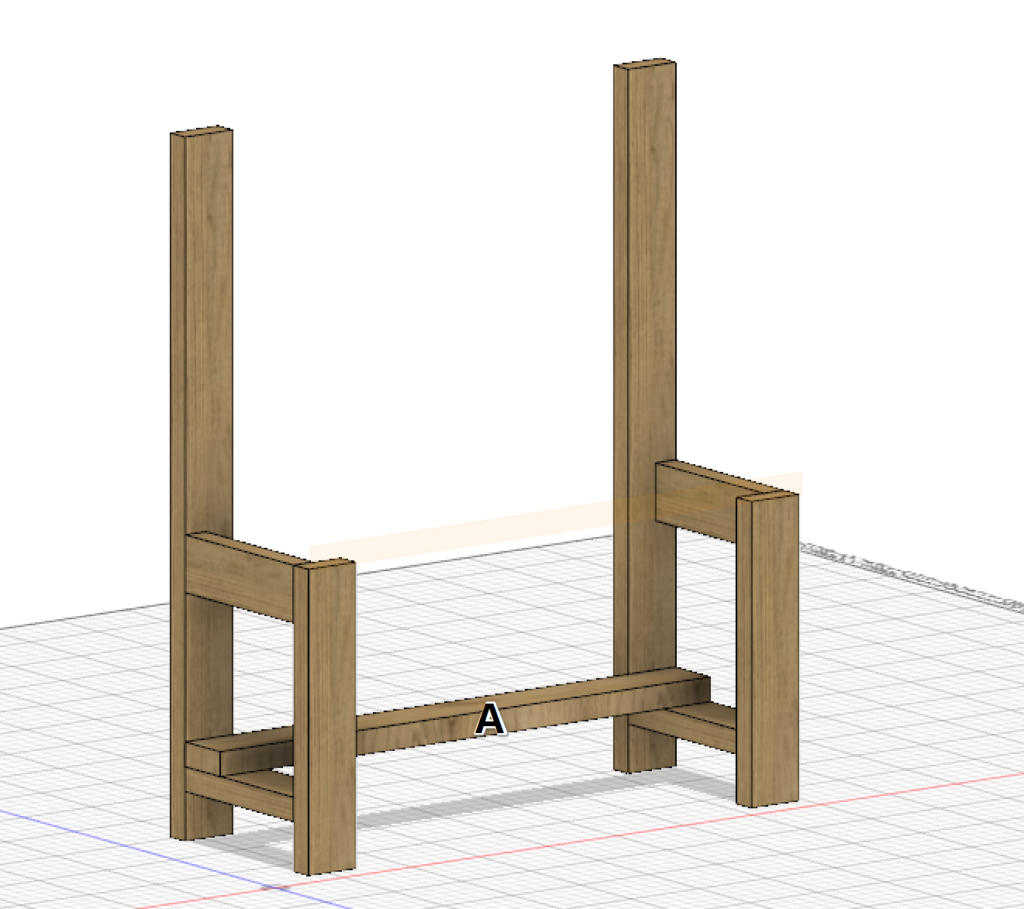
Connect the two assemblies with piece A.
Once connected add two more A pieces in the same area to complete the shelf.
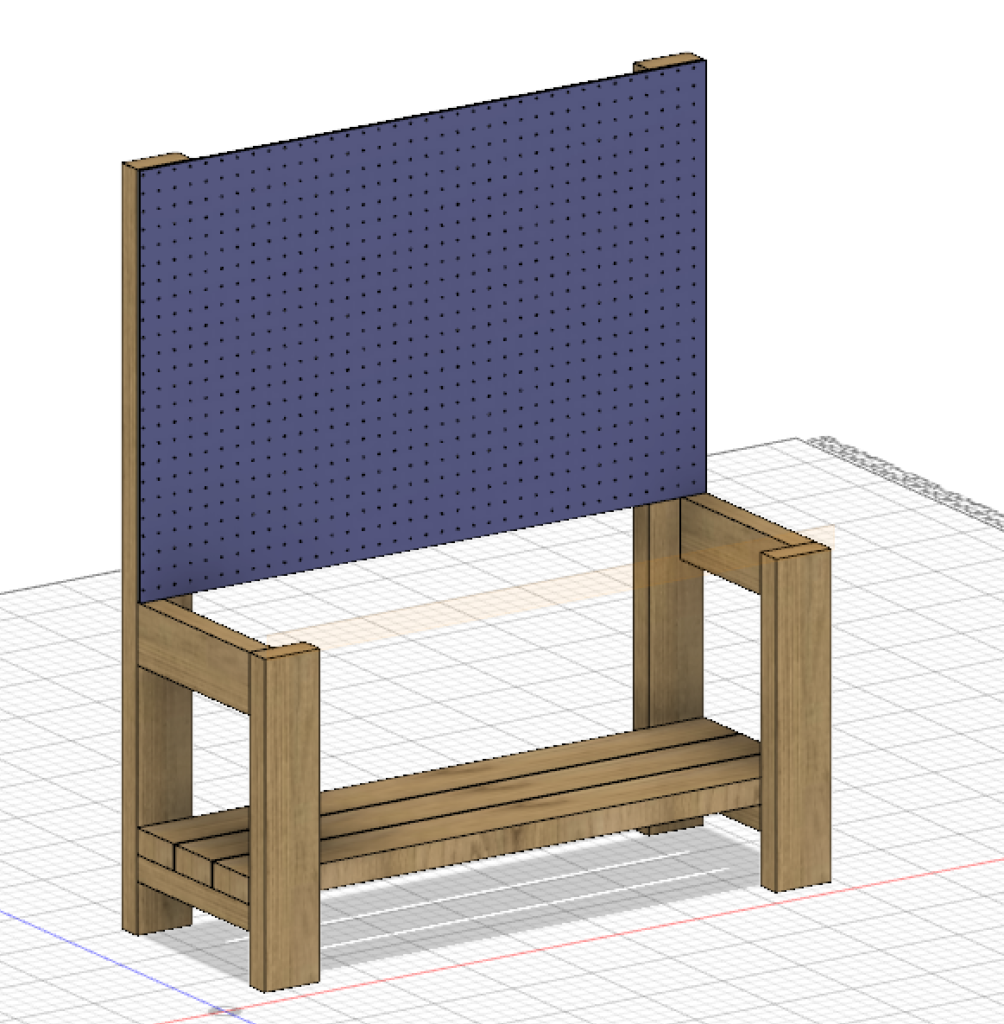
Using your pan head or lath screws attach the top two corners of the peg board.
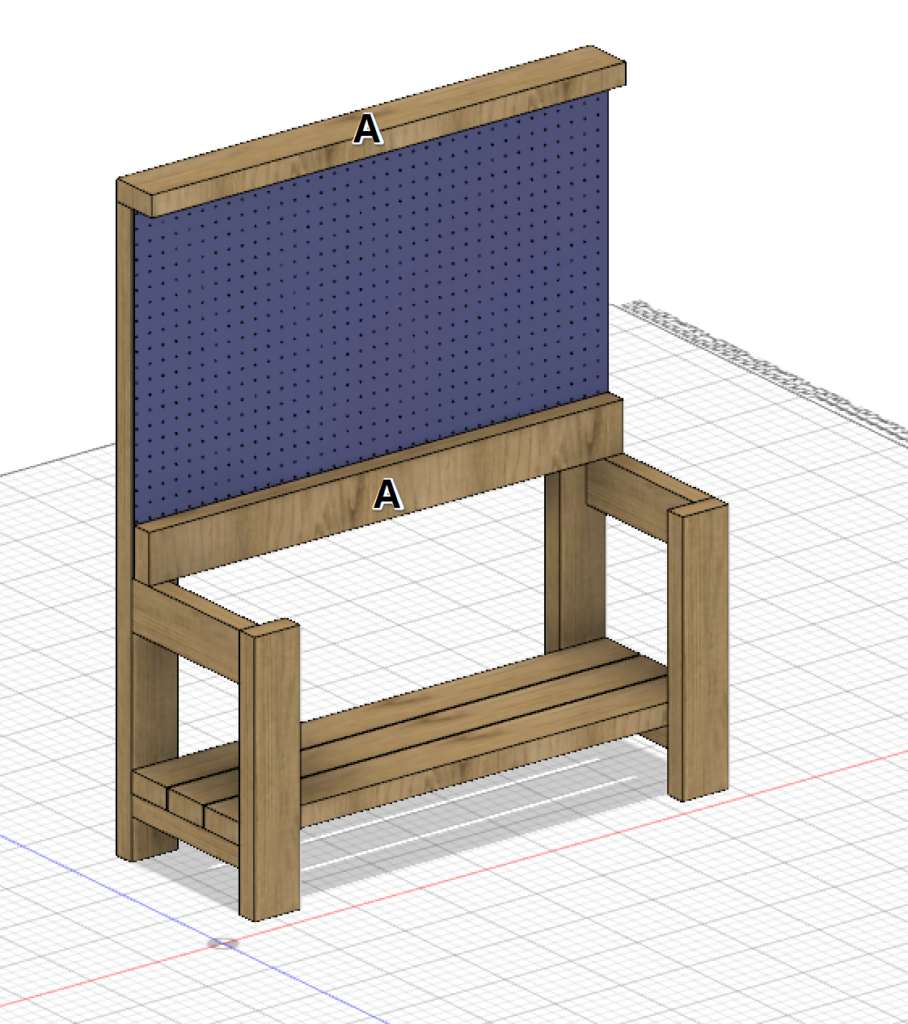
(1/2) Place another A piece this time on its side, up against the bottom of the pegboard.
Attaching this piece also secures the bottom of the pegboard. Note: try to drive the screws in close to the bottom, that way they will be covered up by the boards that go in front.
(2/2) Use two screws on both sides to attach another piece A to the very top of the workbench as shown.
Finish filling in the last 3 A pieces for the workbench top.
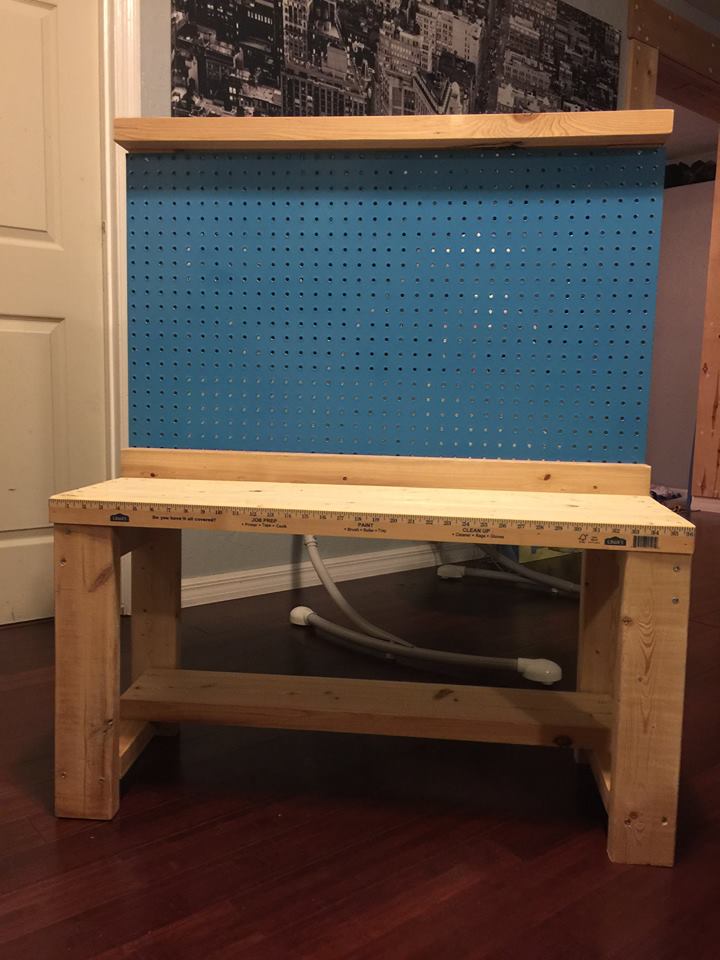
Add yardstick to the front face of the workbench top.
I used a combination of wood glue and brad nails.
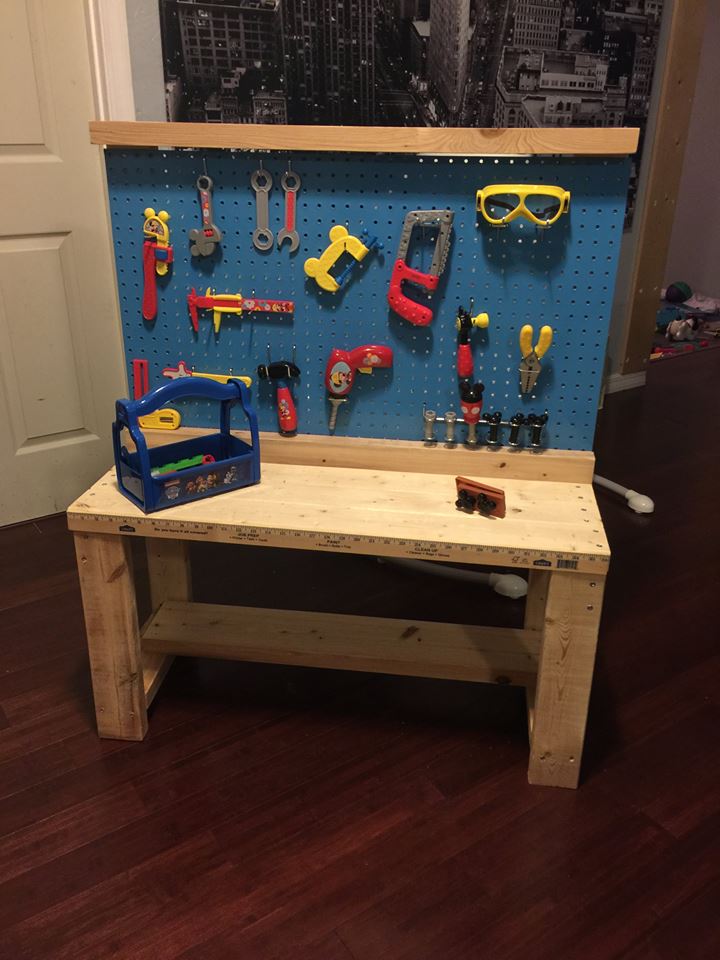
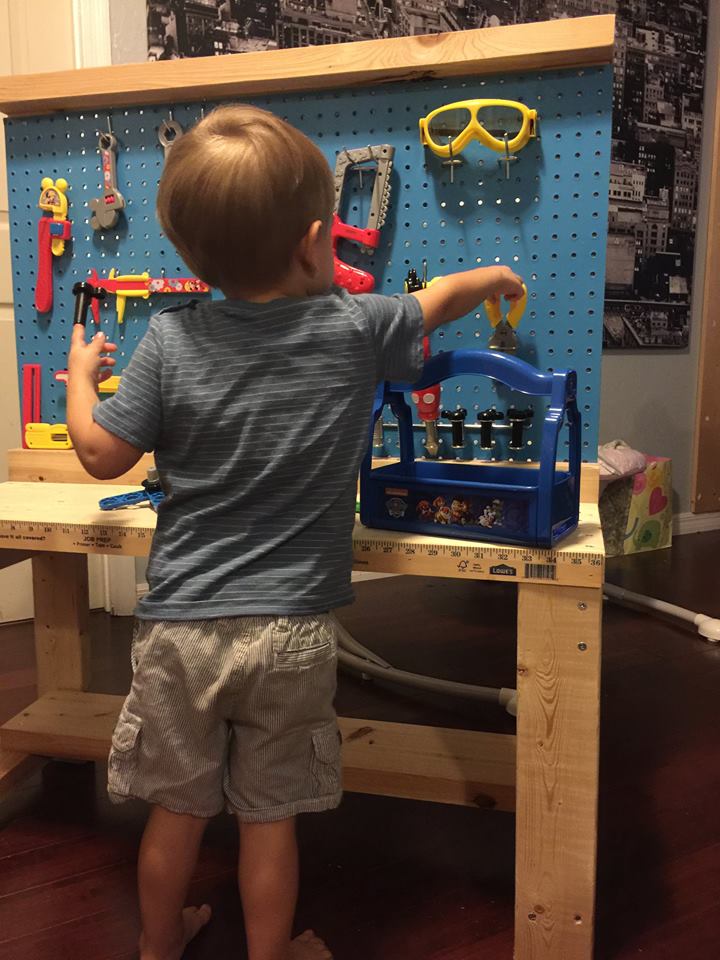
Now its time to add some age-appropriate tools and present it to your new helper.
My son was really happy with it, and still uses it on occasion now (2 years later). This thing is very sturdy and will hold up well as I start introducing him to some basic real tools (hammer, screwdriver, etc). There is a slight discrepancy with the bottom shelf between the design and what I actually made. I just ended up using a spare 2 x 6 that I had on hand but thought it made more sense to use only 2 x 4’s in the design to avoid buying extra lumber.